預先準備2:使用SSH(當然也可以用HTTPS)做為git的傳輸協定,要設置好你的SSH Key,做為身分驗證(Authentication)用
這是做為Android Studio的開發人員,將專案整合到bitbucket的第一步
一、到bitbucket創建一個空的repository:
1.登入bitbucket,進入bitbucket Dashboard:


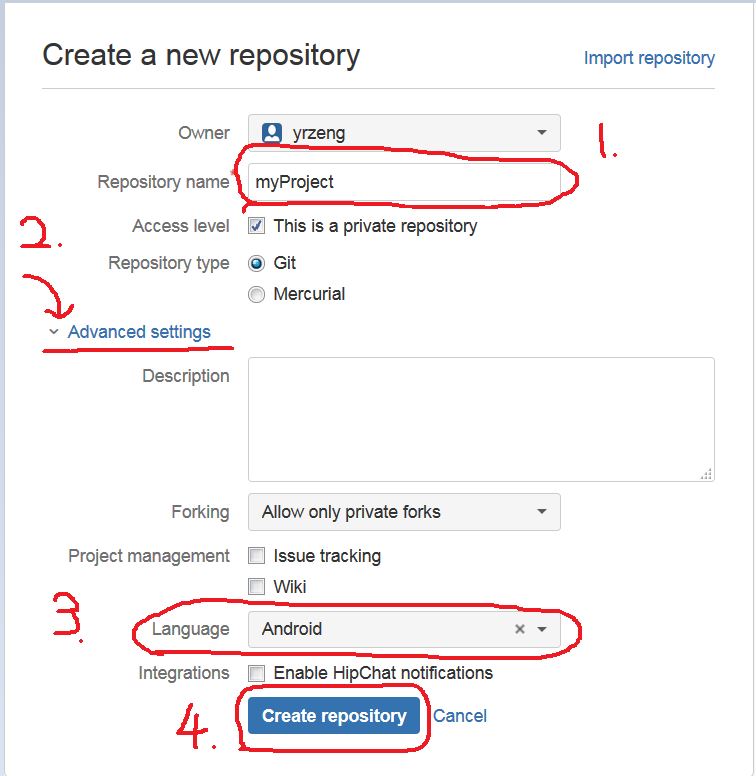
3.輸入Repository name後,點選"Advanced settings"展開其餘選項,Language選擇"Android",最後點擊"Create repository":
4.觀察repository URL:
Create成功後就會進到repository管理頁面,左欄點擊Clone,跳出視窗協定選擇SSH

反白的就是repo URL,先記起來等一下用的到...
二、Create new project with Android Studio:

根據自己的需求去選擇,最後Finish

三、將Project 同步到Git Server(bitbucket)
初始化Git
1.VCS (Alt + S) -> Enable Version Control Integration...

2.Choose Git 按 OK


3.Add files changes to staged:
初始化(2.)完之後,git會偵測file的狀態
按左下角Version Control(Alt + 9)


4.Commit staged files to local repository(Ctrl + k):


5.Push commits to remote git server(bitbucket)(Ctrl+Shift+k):
VCS -> Git -> Push...

點擊Define remote -> 填上剛剛觀察到的URL->OK


檢查一下有沒有push到bitbucket上

原創文章,轉載請註明出處謝謝!~
沒有留言:
張貼留言